Guide to Flawless Flooring Installation in Southlake, TX
Flooring installation is an important home improvement project that will improve the appearance and feel of any space. But, putting in new flooring is a challenging task, especially if do not have the required expertise and knowledge. It is therefore essential to hire expert flooring installers located in Southlake, TX, who will guarantee a flawless and lasting installation. In this comprehensive guide we’ll walk you through the steps for achieving the perfect setup for Flooring Installation Southlake TX.
Step 1: Choose the Right Flooring Material
The first step to an effective flooring installation is deciding on the appropriate flooring material to suit your needs. A few of the most sought-after flooring options within Southlake, TX, include laminate, hardwood vinyl, tile and carpet. Each flooring type has distinct characteristics and features that allow it to be used in particular spaces and needs. For example hardwood flooring is a timeless choice that brings the look and feel of any space. Vinyl and laminate are perfect for areas that are heavily used, like bathrooms and kitchens because they are simple to maintain and clean. Tile flooring is ideal for rooms which require resistance to water like bathrooms and laundry rooms. Carpet is a very popular flooring option for living and bedroom rooms due to its warmth and insulation.
When selecting the ideal flooring for the area be sure to consider aspects such as the durability, maintenance requirements, price, and design. Also, consider the volume of traffic as well as the degree that wear and tear that the flooring will see.
Step 2: Prepare the Subfloor
The performance of your flooring installation is largely contingent on the condition of the subfloor. Make sure you have a clean, smooth dry, and free of debris subfloor prior to laying flooring. Examine the flooring you have already installed for any damage or instability prior to you are installing it over it.
If your flooring isn’t even, you might need to apply a self-leveling substance to make a smooth and even surface. If the subfloor has been damaged, you might need to fix or replace it prior to installing a brand new floor.
Step 3: Measure and Cut the Flooring Material
Flooring is prepared The next step is to measure then cutting out the floor to suit your area. An accurate measurement is vital to avoid spending time and money on incorrectly sized flooring material.
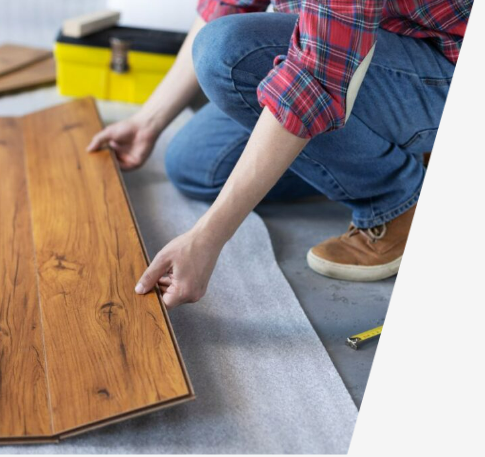
Step 4: Install the Flooring Material
The process of installation varies based on the flooring material you select. For example hardwood floors require nailing or tapering planks onto the floor, as laminate and vinyl flooring require glue-down or floating installation. Tile flooring requires sealing and grouting to ensure that tiles are able to adhere to the subfloor, and also prevent damage from water. Carpet installation requires stretching the carpet and then tucking it into the corners and edges of the room.
If you’re planning to install flooring made of tile or wood it is essential that you allow your flooring to adjust to the temperature of the room as well as humidity over a couple of days prior to installing. This can stop warping, buckling or cracking in the flooring material.
During the process of installation be sure you have the floor placed properly and securely. Any gaps or irregularities in the flooring could impact its durability and stability.
Step 5: Finish the Flooring
Once the flooring material has been installed then the next step is to finish the flooring in order to increase its durability, appearance and performance. For instance,